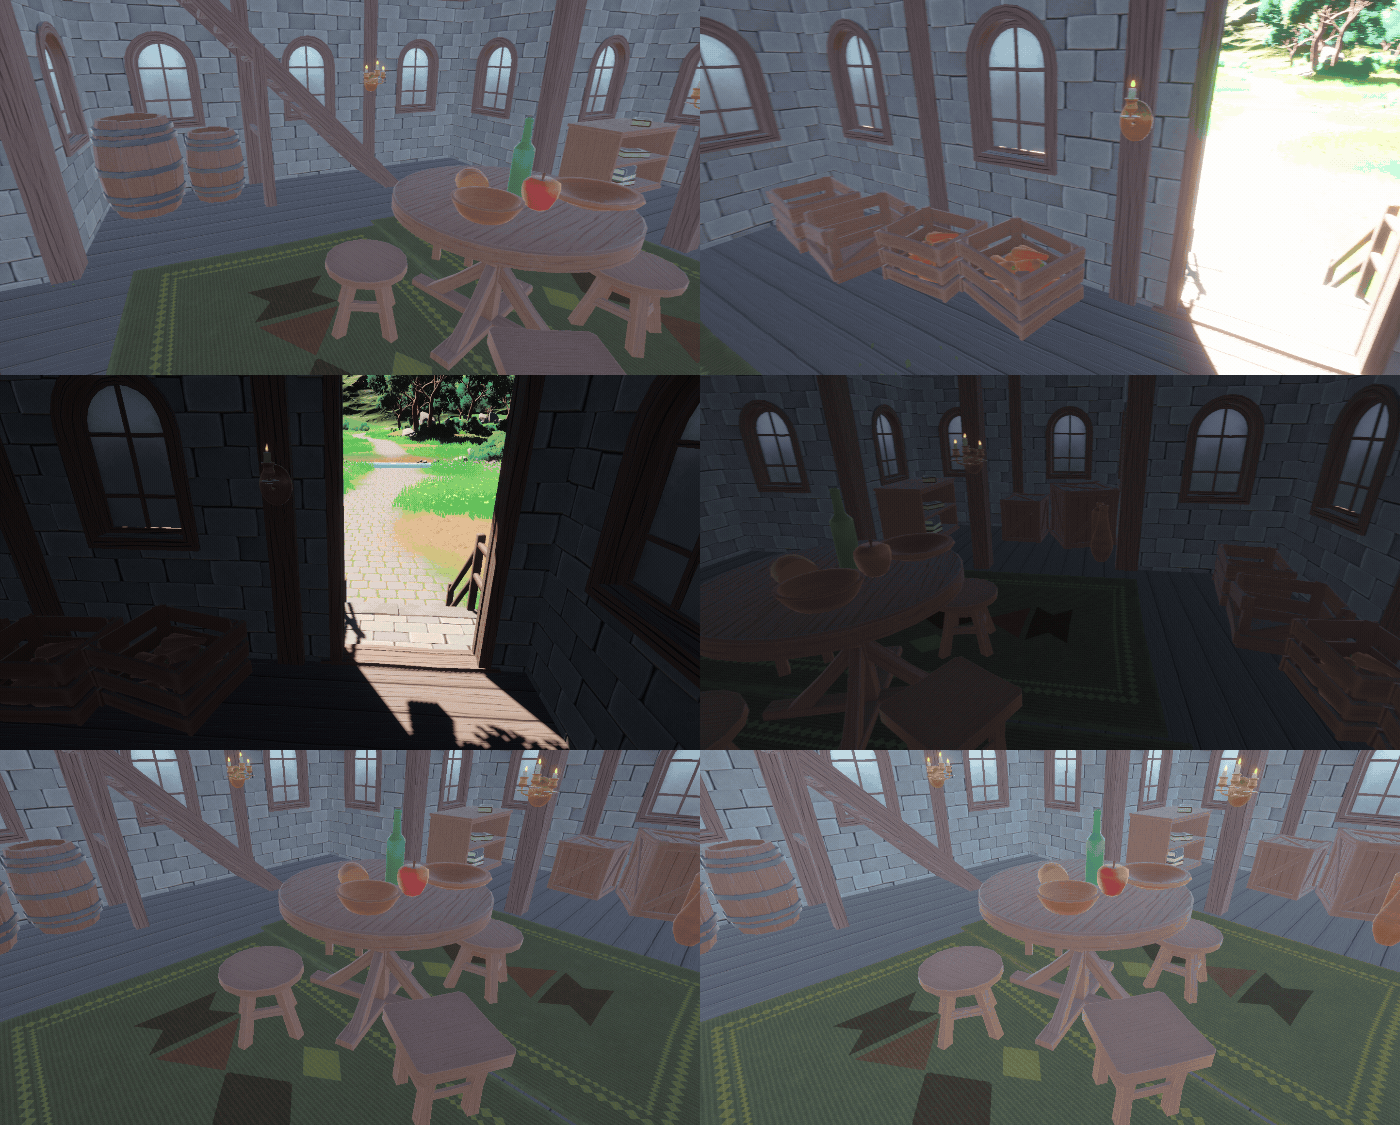
基础自动曝光实现
Github源码传送门————>AutoExposure
Bilibili教程传送门————>小祥带你实现自动曝光

实现思路
自动曝光(AutoExposure)的目的是让画面的整体亮度保持在人眼能接受的合理区间,所以自动曝光也被称为人眼适应(EyeAdaptation)。地球Online中,相机成像的三要素是光圈,快门,ISO,光圈大小和快门速度控制进光亮,ISO控制传感器感光强度,相机的自动曝光实际上就是通过控制这些参数来保证图像亮度合理。游戏中的话不需要考虑这么多参数,我们的目的是控制整体画面亮度,那么其实只需要计算一个曝光系数应用到画面调整画面整体的亮度即可。作为一个后处理效果实现思路分三步,采样累积画面的亮度,计算目标曝光系数,应用曝光到输出画面。
AccumulateLuminance
1
2
3
4
5
6
7
8
9
10
11
12
13
14
15
16
17
18
19
20
21
22
23
24
| #pragma kernel AccumulateLuminance
[numthreads(NUMTHREAD_X, NUMTHREAD_Y, 1)]
void AccumulateLuminance(uint3 id : SV_DispatchThreadID, uint groupIndex : SV_GroupIndex)
{
if (!any(id.xy))
{
_RWParameters[0].importance = 0;
_RWParameters[0].luminance = 0;
_RWParameters[0].exposure = 0;
}
half2 uv = id.xy / _ScreenSize.xy;
half2 uvCenter = half2(0.5, 0.5);
float importance = pow(saturate(1.0 - (distance(uv, uvCenter) * 2.0)), 2);
float3 screenColor = _ScreenTexture[id.xy].rgb;
float luminance = dot(screenColor, _RGB2Luminance);
uint imp = (uint) (100.0 * importance);
uint lum = (uint) (100.0 * luminance * importance);
InterlockedAdd(_RWParameters[0].importance, imp);
InterlockedAdd(_RWParameters[0].luminance, lum);
}
|
- **!any(id.xy)**保证只在第一个像素的时候进行初始化
- importance画面不同区域贡献的亮度权重不同,一般是视野中心最高,向四周逐渐降低
- _RGB2Luminance权重向量,将色值转为亮度,Rec.709标准
- InterlockedAdd将亮度和权重转为uint值之后进行原子累加(多线程防止写覆盖)
ComputeTargetEV
1
2
3
4
5
6
7
8
9
10
11
12
13
14
15
16
17
18
19
20
21
22
23
24
25
26
27
28
| float GetEV100(float luminance)
{
luminance = max(luminance, 1e-5);
return log2(luminance * 8.0);
}
float GetTargetEV(float luminance)
{
float avgEV = GetEV100(luminance);
float targetEV = avgEV;
float historyEV = _RWParameters[0].historyEV;
float diff = avgEV - historyEV;
float t = min(_RParameters[0].deltaTime, 0.033);
return historyEV + diff * t;
}
#pragma kernel ComputeTargetEV
[numthreads(1, 1, 1)]
void ComputeTargetEV(uint3 id : SV_DispatchThreadID)
{
float lum = 0.01 * _RWParameters[0].luminance;
float imp = max(0.01 * _RWParameters[0].importance, 1e-5);
float avgLuminance = lum / imp;
float targetEV = GetTargetEV(avgLuminance);
_RWParameters[0].historyEV = targetEV;
_RWParameters[0].exposure = 1.0 / pow(2.0, targetEV);
}
|
- 拿到累积的亮度值和权重值算出加权平均亮度
- GetEV100方法将亮度转为标准感光度ISO100下的曝光值
- GetTargetEV在历史曝光值和目标曝光值之间进行插值,让亮度平滑变化
- **1.0 / pow(2.0, targetEV)**曝光值转为曝光系数
ApplyExposure
1
2
3
4
5
6
7
| #pragma kernel ApplyExposure
[numthreads(NUMTHREAD_X, NUMTHREAD_Y, 1)]
void ApplyExposure(uint3 id : SV_DispatchThreadID)
{
float3 screenColor = _ScreenTexture[id.xy].rgb;
_ScreenTexture[id.xy].rgba = float4(screenColor * _RWParameters[0].exposure, 1.0);
}
|
- 应用曝光系数到画面,需要注意这里的色值明显会超过1.0,所以记得开启HDR才能正确显示
优化方向
- 添加曝光补偿曲线,方便调整曝光补偿
- 可以模拟人眼对光照适应的行为,调整由亮到暗以及由暗到亮的亮度变化速度
- 添加预曝光,写入场景颜色之前先把当前场景的亮度按上一帧的曝光进行线性缩放,先把 HDR 范围映射到一个合适的区间,再进行后续渲染和色彩运算
完结撒花~


